Reinstall Firmware
You can restore the QuattroPod by manually reinstalling the firmware. There are several reasons for doing so:
-
The QuattroPod cannot be powered on. The power supply has already been checked. In this case, an interrupted firmware upgrade may be the cause.
-
The QuattroPod is unstable and a reset did not help.
-
You have the choice: Either install the latest firmware or another firmware version.
Note
Reinstalling the firmware will reset all settings.
Install Firmware via USB Cable
Requirements
-
The firmware update software is only supported on Microsoft Windows.
-
The receiver must be connected to a Windows PC with a USB cable (A/A)

Receiver - Reinstall Firmware
Receiver (R01) Repair Tool Download
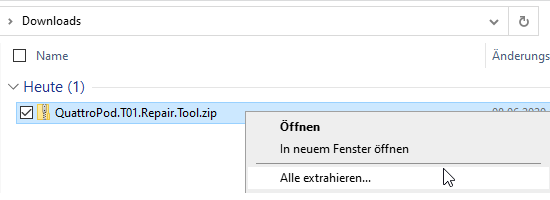
-
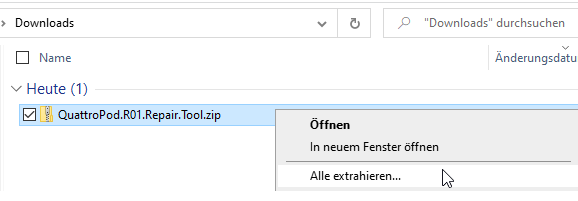
Download the QuattroPod Receiver (R01) Repair Tool.
-
Extract the file QuattroPod.R01.Repair.Tool.zip.
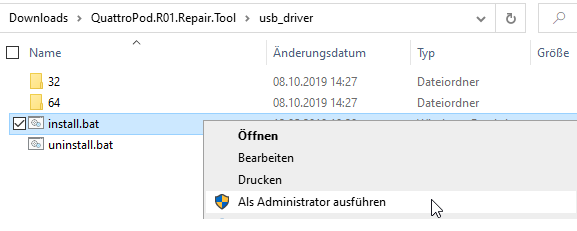
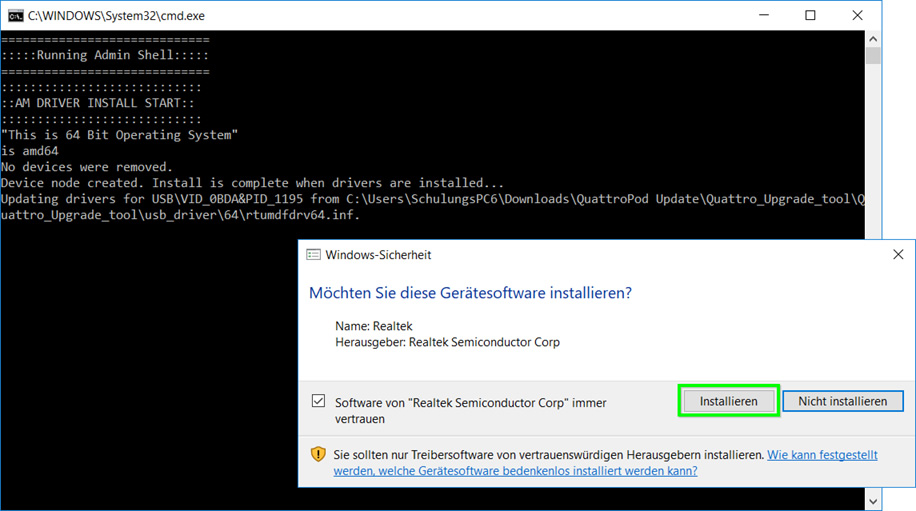
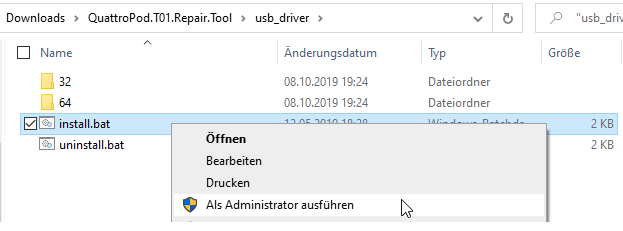
- Install the drivers by running the batch file QuattroPod.R01.Repair.Tool\usb_driver\install.bat as administrator.
- When the following security prompt appears, choose
Install:
Set Receiver to Update Mode
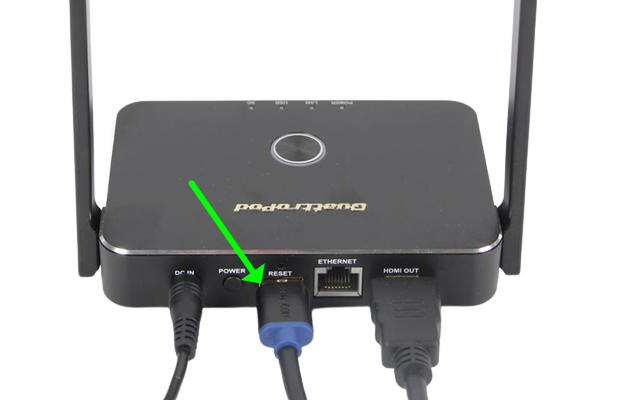
To set the receiver to update mode, follow these steps in order:
- Turn off the device using the power button
- Use a small "pin" to press and hold the reset button
- Turn on the device using the power button
- Then release the reset button
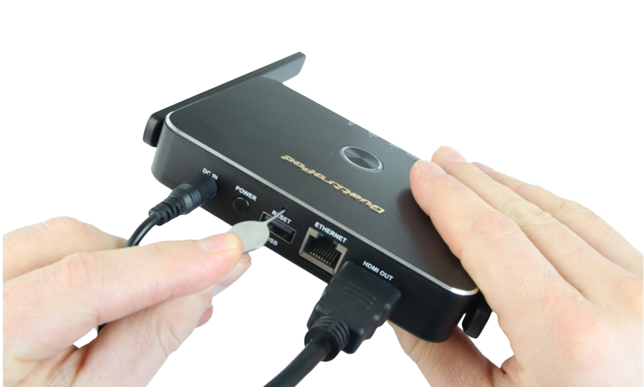
- Now connect the USB cable (A/A) to the USB port of the receiver and a USB port of your Windows PC.
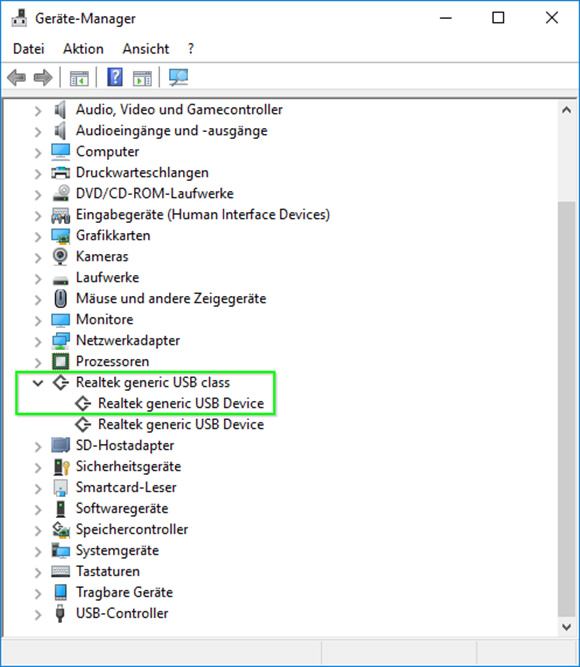
If the driver is properly installed and the receiver is connected, the device Realtek generic USB Device should appear in Device Manager. If not, check the driver installation, cable setup, and update mode as described above.
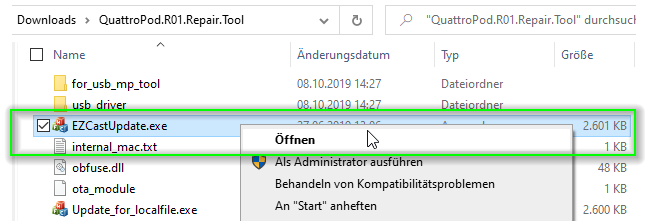
Install Latest Firmware
- In the
QuattroPod.R01.Repair.Toolfolder, run the file EZCastUpdate.exe.
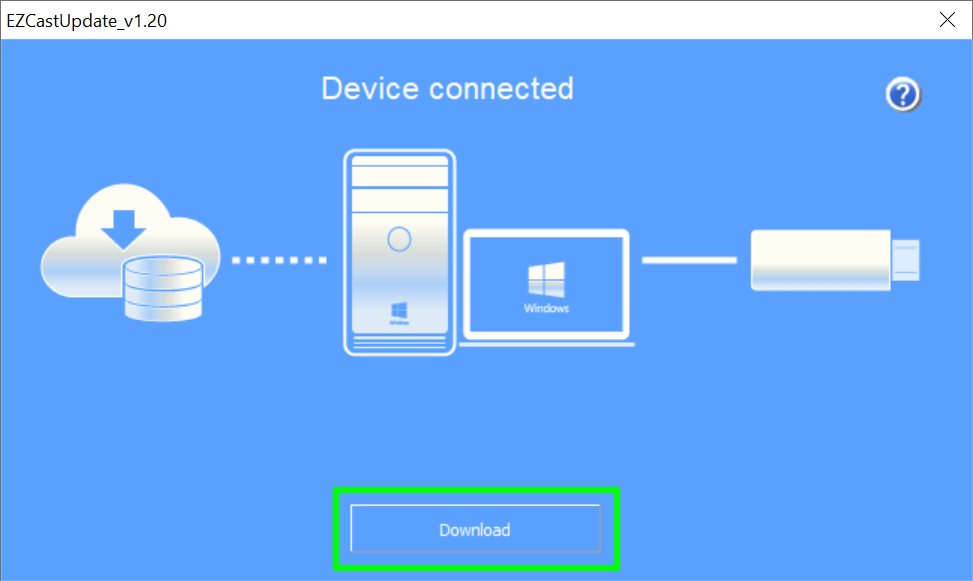
The following window appears. If the QuattroPod receiver is successfully in update mode, the tool shows status Device connected:
- Select
Downloadto download the latest firmware.
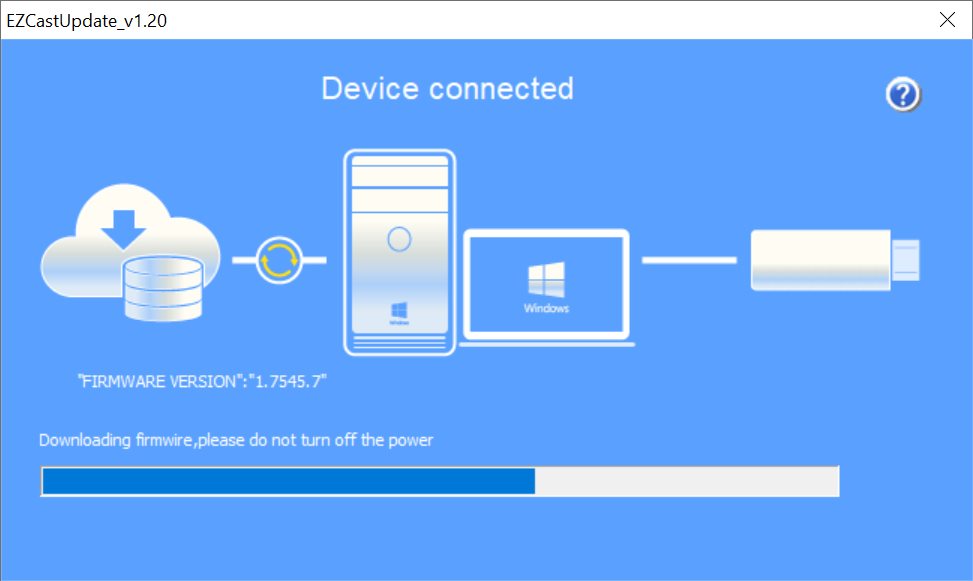
The firmware is downloaded:
Note
Do not disconnect the power during the update.
- To start installing the firmware, select
Upgrade:

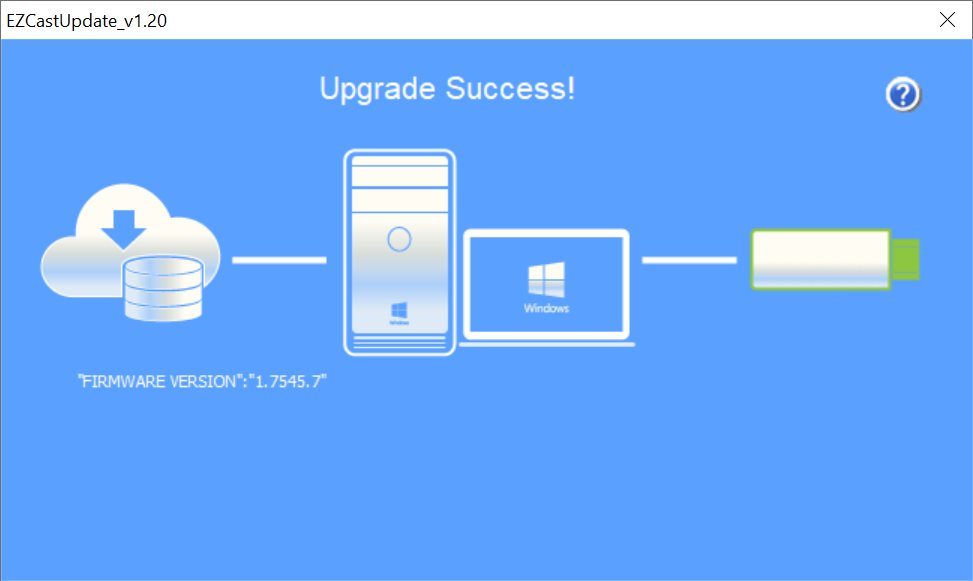
The firmware is installed:

At the end of the update, the status Upgrade Success is displayed:
- You can now unplug the USB cable and restart the receiver by turning it off and on again using the power button.
Turn the receiver off and on again. The receiver is now ready for use.
Install Other Firmware
To install a previous or beta firmware version, download one of the following files:
| Firmware | Receiver R01 | Note |
|---|---|---|
| 1.16163.190 (Beta) | Download | |
| 1.16163.151 | Download | |
| 1.16163.150 | Download | |
| 1.16163.149 | Download | |
| 1.16163.108 | Download | |
| 1.16163.65 | Download | |
| 1.16163.57 | Download | |
| 1.16163.41 | Download | |
| 1.16163.12 | Download | |
| 1.14366.129 | Download | |
| 1.14366.90 | Download | |
| 1.14366.62 | Download | |
| 1.12412.47 | Download | |
| 1.12412.42 | Download |
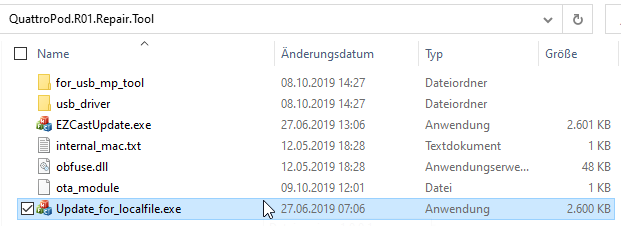
- In the
QuattroPod.R01.Repair.Toolfolder, run the file Update_for_localfile.exe.
The following window appears. If the QuattroPod is in update mode, the tool shows Device connected.
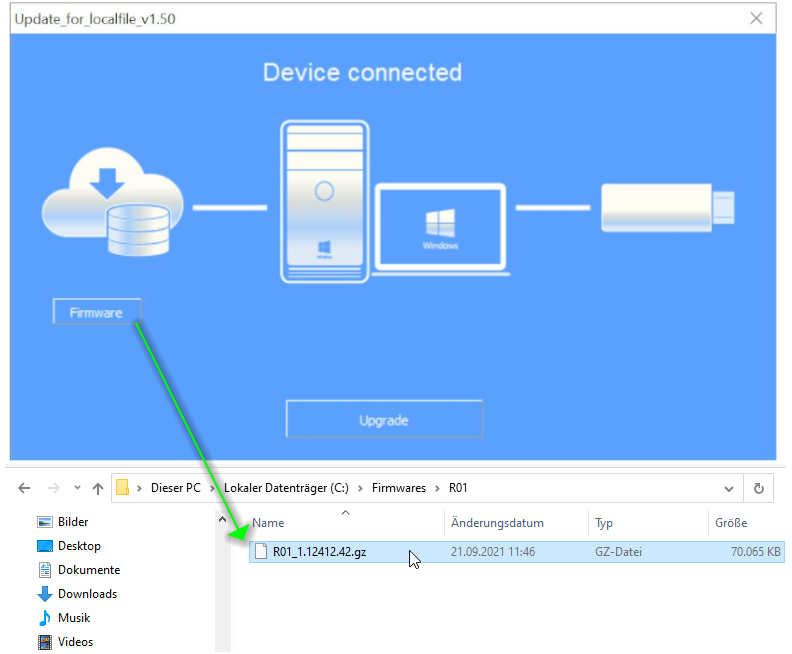
- Use the
Firmwarebutton to select the desired firmware file.
- To start installing the firmware, select
Upgrade.
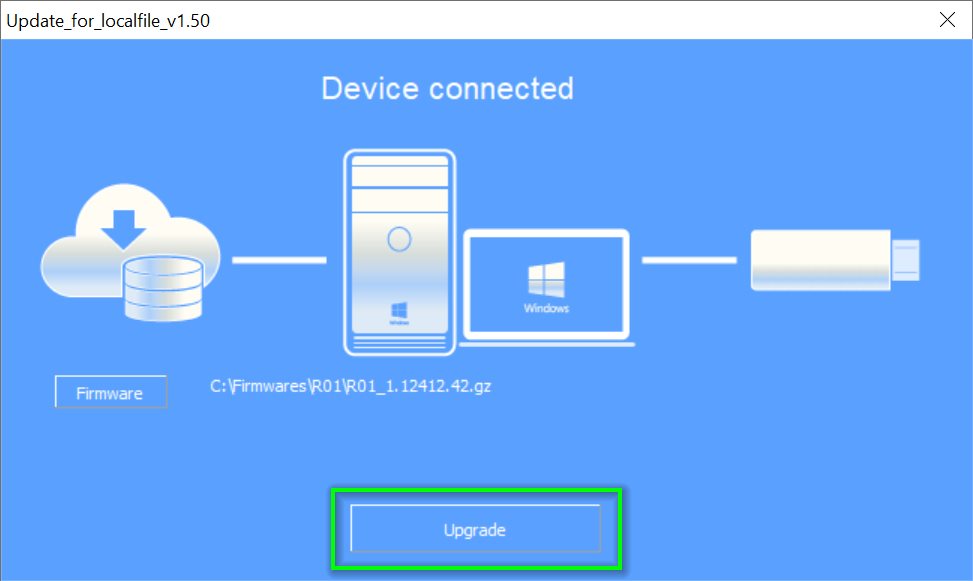
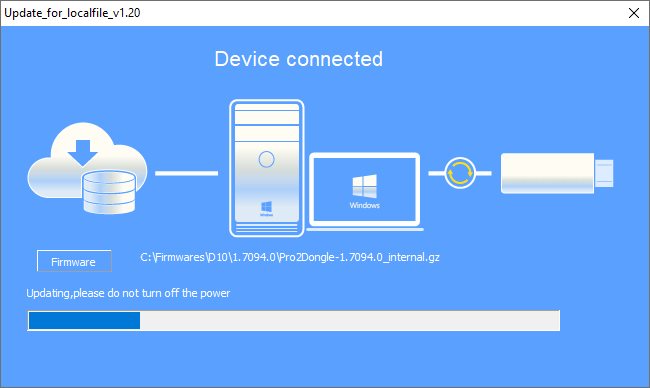
The firmware is installed.
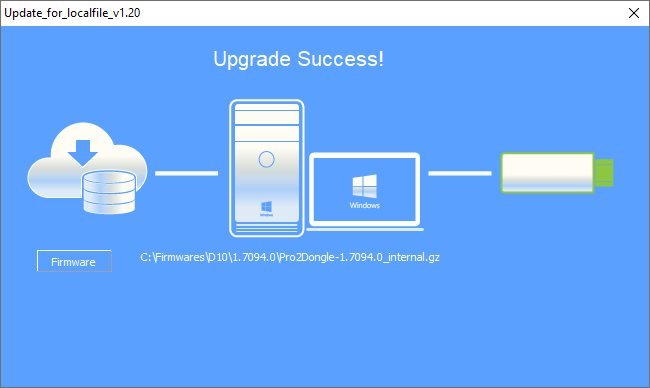
If installation is successful, the following message appears:
Turn the receiver off and on again. The receiver is now ready for use.
Sender - Reinstall Firmware
Sender (T02) Repair Tool Download
-
Download the QuattroPod Mini Sender (T02) Repair Tool.
-
Extract the file QuattroPod.T02.Repair.Tool.zip.
- Install the drivers by running the batch file QuattroPod.T02.Repair.Tool\usb_driver\install.bat as administrator.
- When the following security prompt appears, choose
Install:
Set Sender to Update Mode
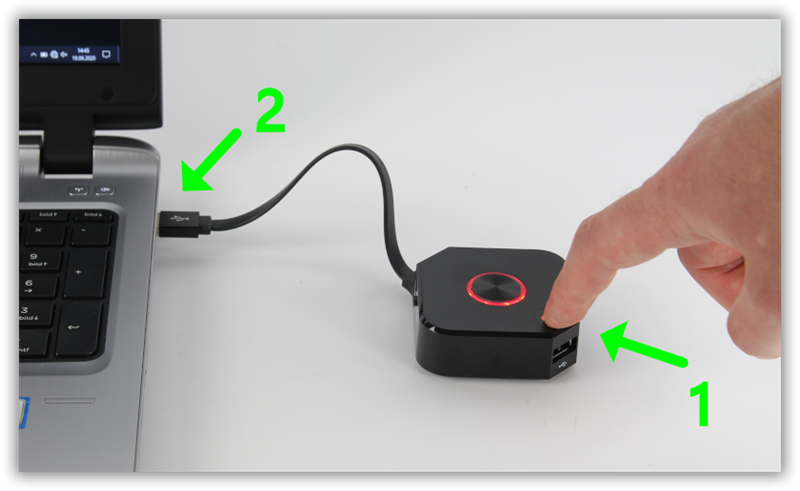
- To set the sender to update mode, press and hold the
Control Button(1), then connect the sender's USB cable to a USB port on yourcomputer(2). After one second, you can release the control button.
Install Latest Firmware
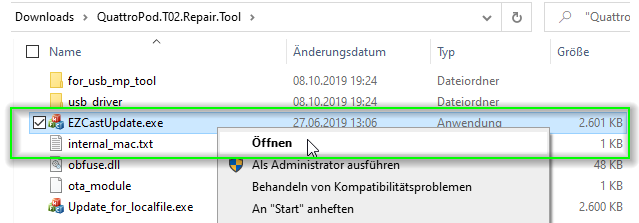
- In the
QuattroPod.T02.Repair.Toolfolder, run the file EZCastUpdate.exe.
The following window appears. If the QuattroPod sender is successfully in update mode, the tool shows status Device connected:
- Select
Downloadto download the latest firmware.
The firmware is downloaded:
Note
Do not disconnect the power during the update.
- To start installing the firmware, select
Upgrade:
The firmware is installed:
At the end of the update, the status Upgrade Success is displayed:
- You can now unplug the USB cable and restart the sender.
You can now disconnect the sender from the computer and close the software.
Install Other Firmware
To install a previous or beta firmware version, download one of the following files:
| Firmware | Sender T02 |
|---|---|
| 1.16163.150 | Download |
| 1.16163.149 | Download |
| 1.16163.72 | Download |
| 1.16163.65 | Download |
| 1.16163.38 | Download |
| 1.16163.12 | Download |
| 1.14366.129 | Download |
| 1.14366.87 | Download |
| 1.14366.62 | Download |
| 1.12412.47 | Download |
| 1.12412.42 | Download |
- In the
QuattroPod.T02.Repair.Toolfolder, run the file Update_for_localfile.exe.
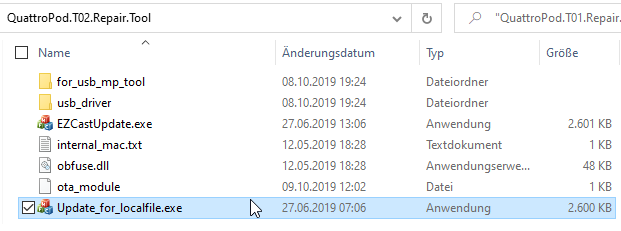
The following window appears. If the QuattroPod is in update mode, the tool shows Device connected.
- Use the
Firmwarebutton to select the desired firmware file.
- To start installing the firmware, select
Upgrade.
The firmware is installed.
If installation is successful, the following message appears:
You can now disconnect the sender from the computer and close the software.
Note
After the firmware update, each sender must be repaired with the receiver.
Install Firmware with CMS
With the CMS (Central Management System), you can not only install the latest firmware from the internet on multiple EZCast Pro II or QuattroPod devices, but also a previous or beta firmware version.
-
Select the desired devices, then click the
Remotebutton -> and theDevice Firmware upgradefunction.
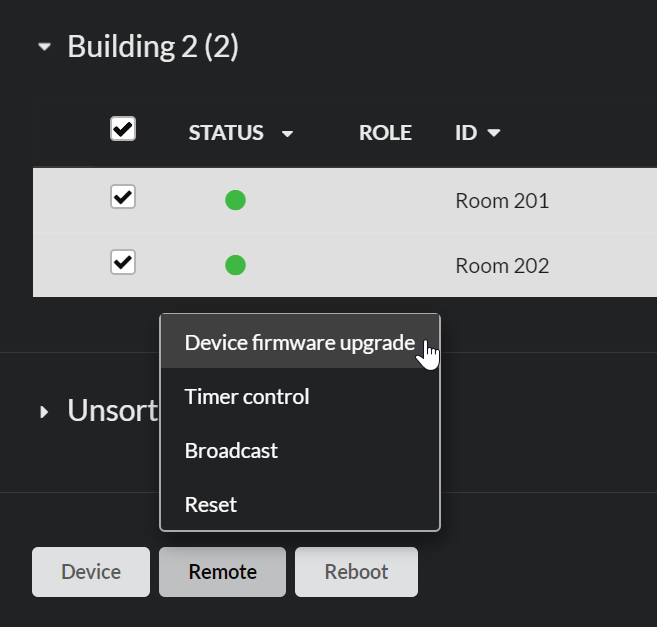
- Under the
FILEtab, click theFilebutton and select the firmware file you downloaded in the first step.
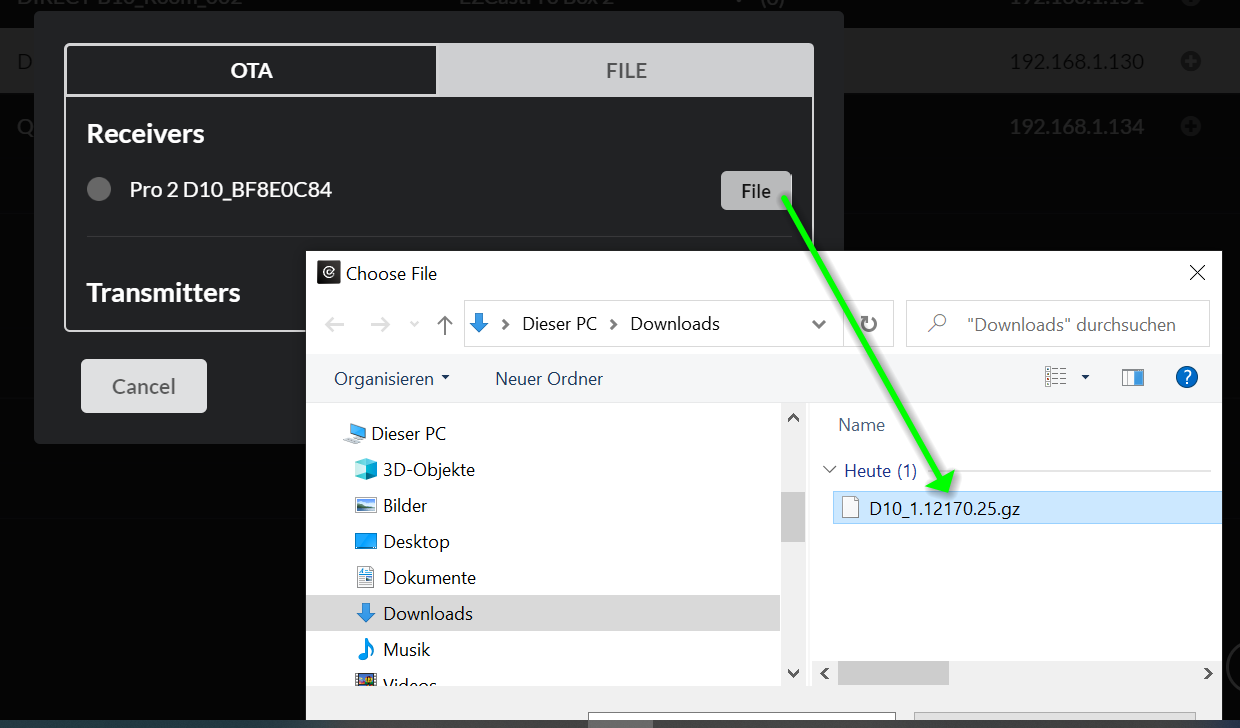
The new firmware is downloaded and automatically installed.
Warning
Do not interrupt the power supply during the update.

Troubleshooting
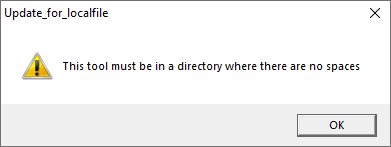
Error message: Tool must be in a directory where there are no spaces
- The repair tool must be in a file path without spaces, e.g.,
C:\Repair_Tool\EZCastUpdate.exe. To avoid this error message, move the software to a path without spaces.