Pairing the Transmitter
The QuattroPod receiver can be paired with up to 32 transmitters simultaneously. The transmitters are pre-paired with the supplied receiver by default. However, you can purchase additional transmitters or use transmitters with a different receiver. There are three ways to pair a transmitter with a receiver:
Connect the transmitter to the receiver
The transmitter is connected to the USB port of the receiver and the devices pair automatically. Some find this option easiest when the receiver is easy to reach. If the receiver is mounted on the ceiling or simply hard to reach, pair the transmitter either via QR code or via USB stick.
- Switch the transmitter to
PC.
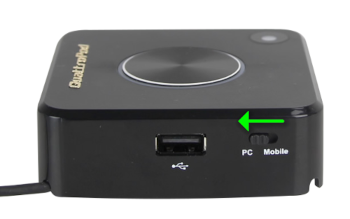
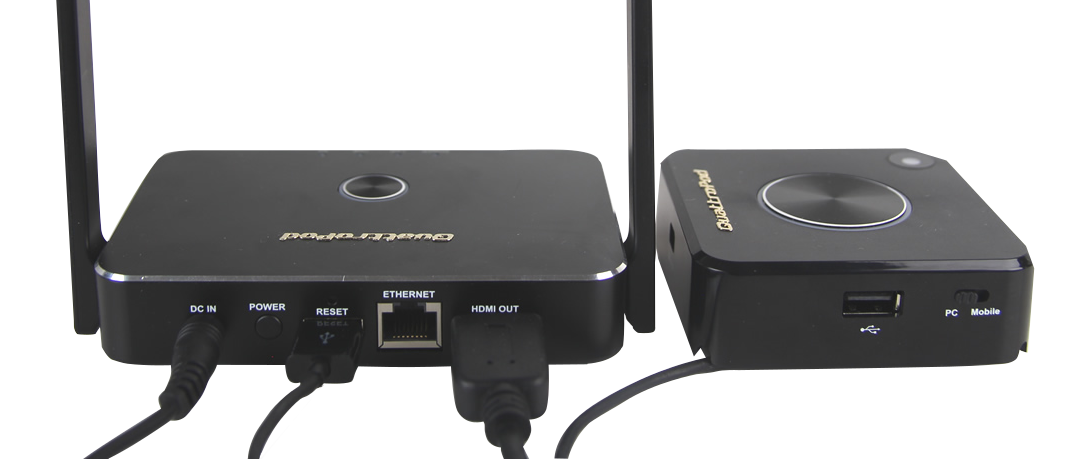
- Connect the transmitter to the USB port of the receiver and turn on the receiver.
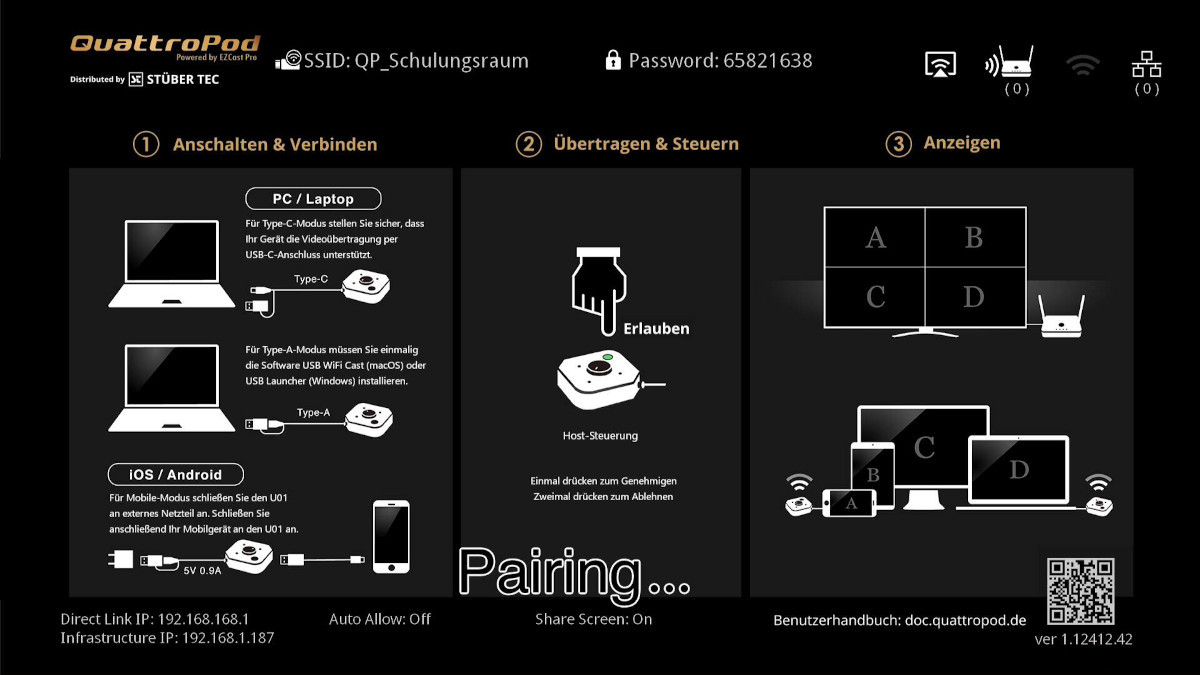
The message "Pairing..." automatically appears on the QuattroPod home screen. During pairing, the transmitter flashes red and the receiver flashes white.
After a few seconds, the transmitter is paired with the QuattroPod. The receiver and the transmitter light up white.

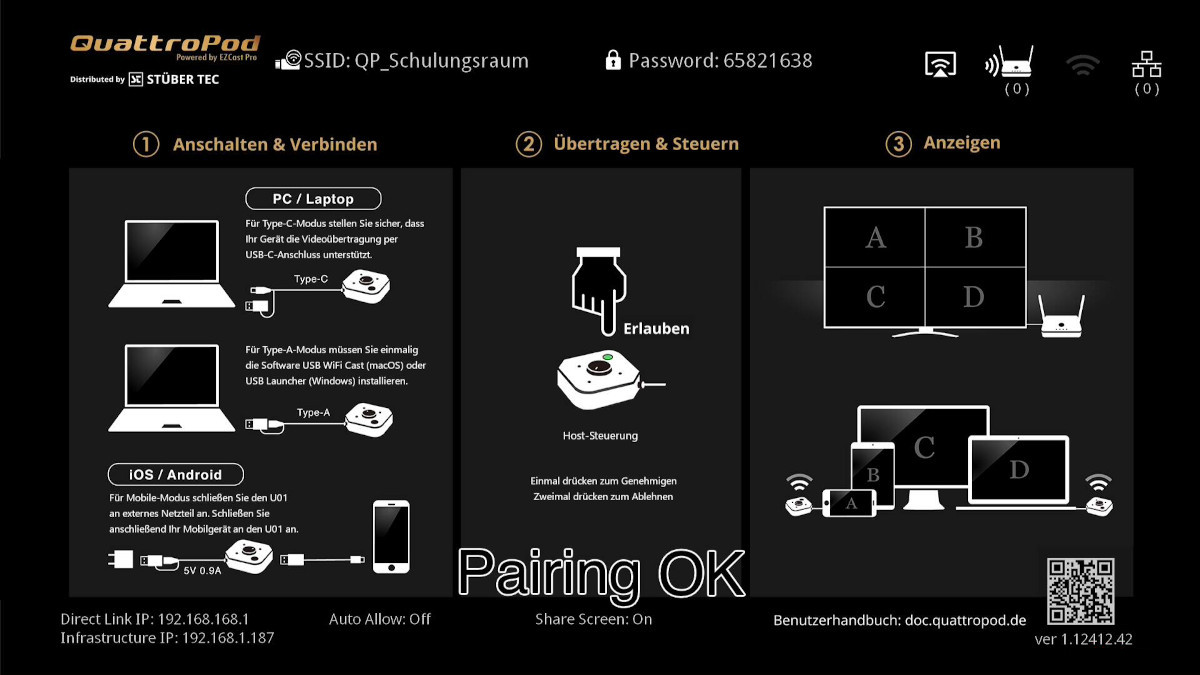
This is confirmed with "Pairing OK" on the home screen.
The transmitter can now be used with the corresponding receiver. Finally, switch the transmitter to the desired mode and connect it to the desired end device:
-
Mobile= Smart devices -
PC= Windows/macOS
Pair transmitter via QR code
Note
This step must be done in the same room or within wireless range of the receiver.
-
Remove the USB-A adapter from the transmitter and switch the transmitter to
Mobile. Connect the transmitter to a USB-C port of your Windows/macOS computer: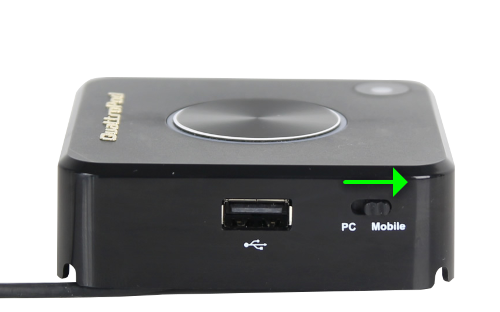
Open advanced settings
- To access the web interface, connect your notebook to the QuattroPod, either via the SSID of the QuattroPod or the same Wi-Fi or LAN infrastructure that the QuattroPod is connected to:
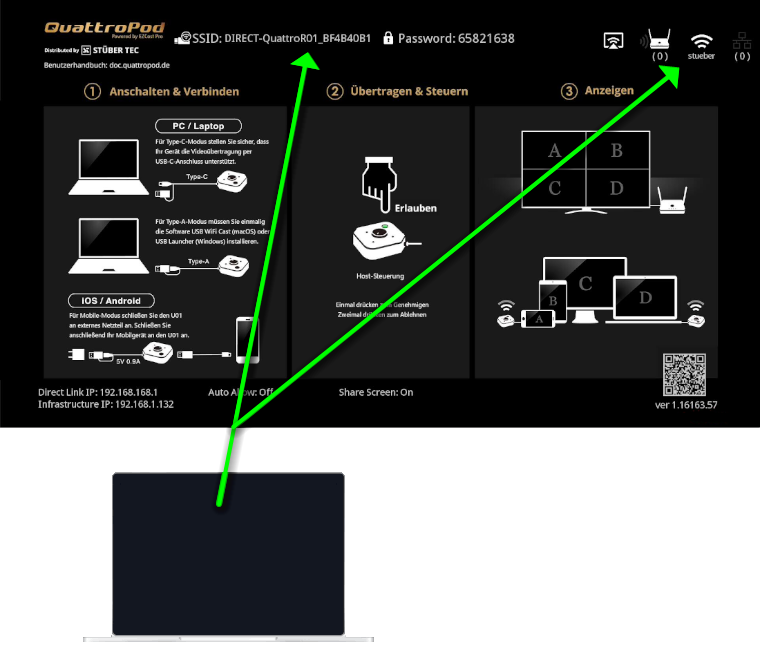
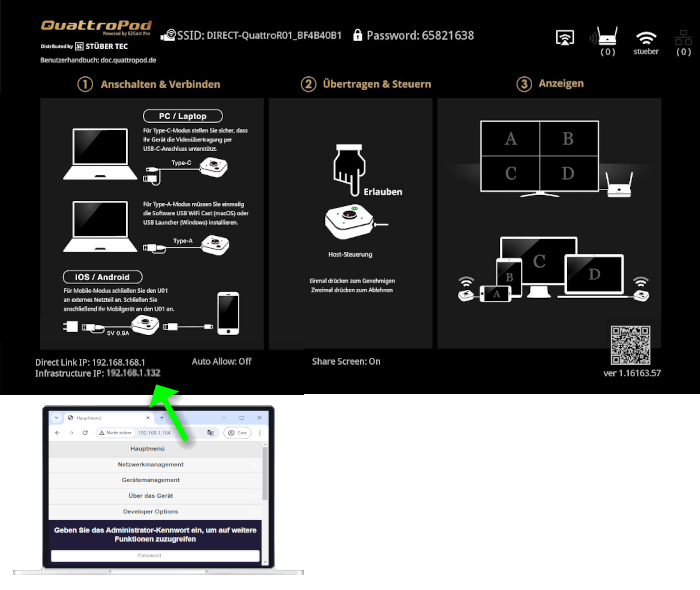
- Enter the IP address of the Cast Go! in the address bar of a web browser, either the
Direct Link IPor theInfrastructure IP, depending on which your notebook is connected to. The Cast Go! settings interface will appear:
Display QR code
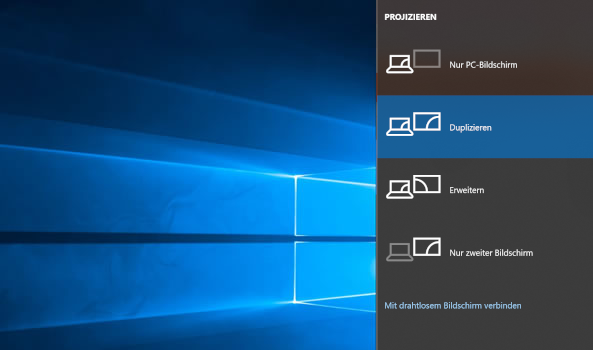
- If Extended Desktop is active, first switch to the monitor mode
Duplicate. Press the shortcut[Windows key]+[P]:
- Scroll down to the bottom of the page so the QR code is fully displayed:
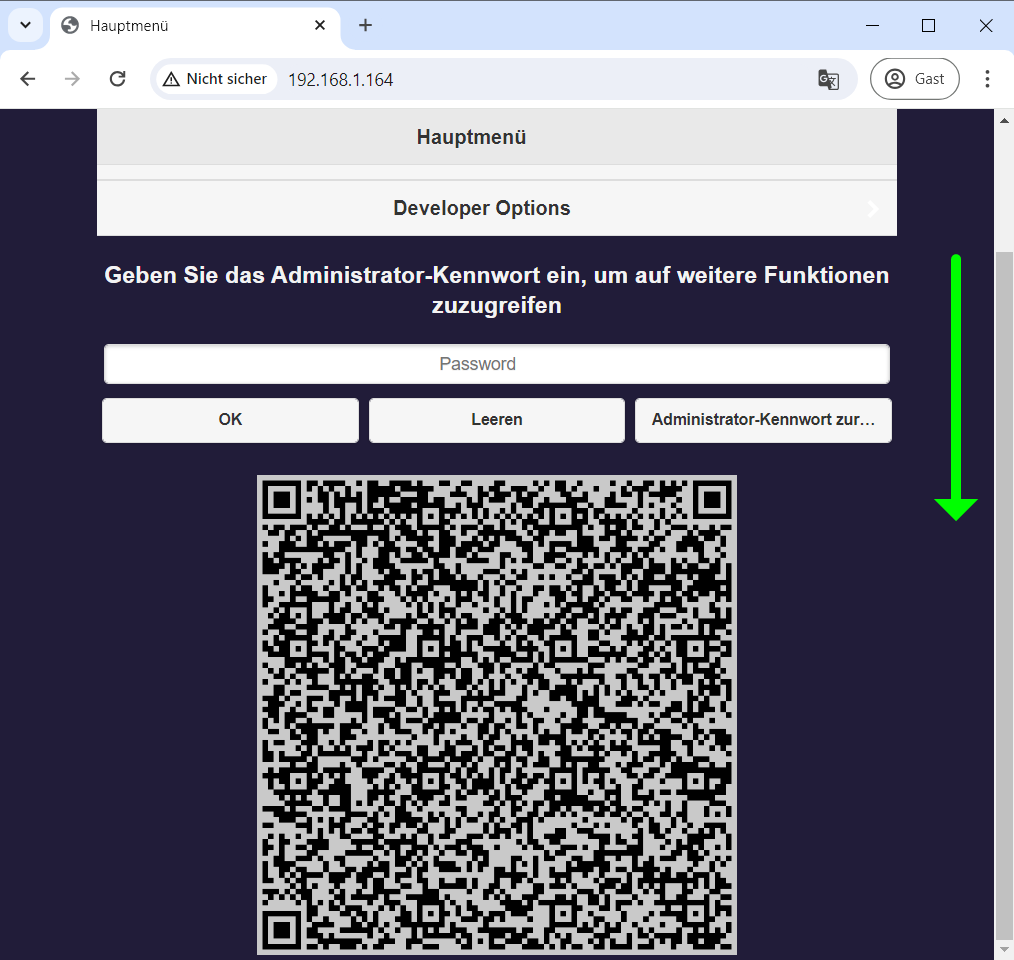
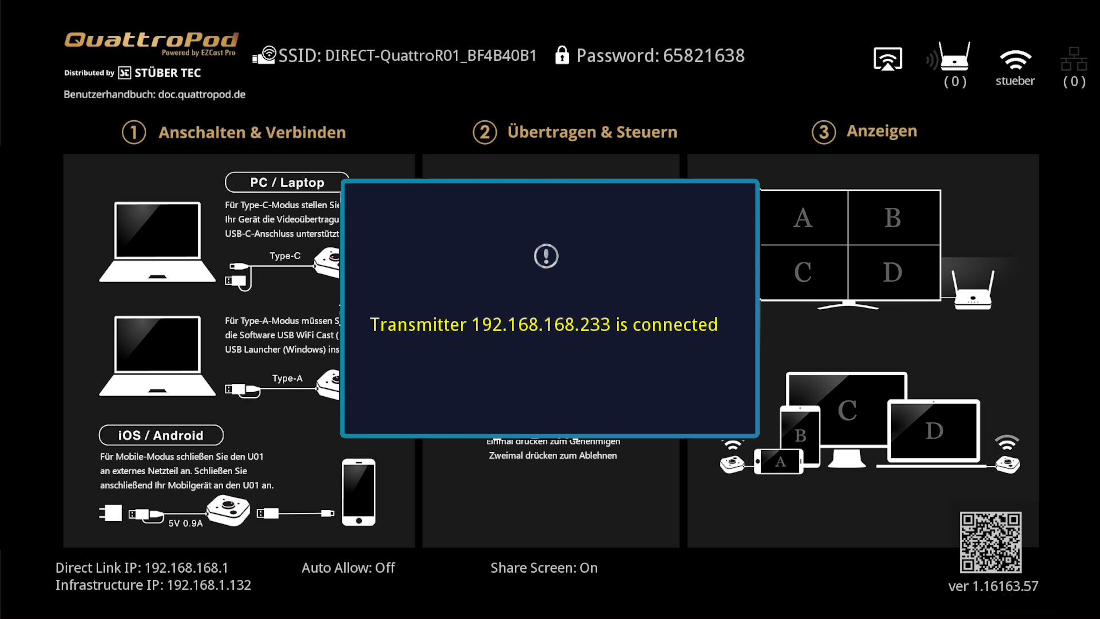
- Within 5 seconds, the transmitter recognizes the QR code and pairs with the receiver. This is confirmed with "Transmitter 192.168.168.xxx is connected" on the home screen. The transmitter can now be used for screen sharing:
Pair transmitter via USB stick
If the receiver is out of range and difficult to access, you can download a pairing file and copy it to the transmitter using a USB stick.
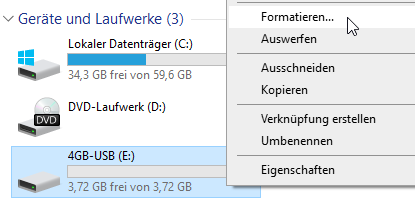
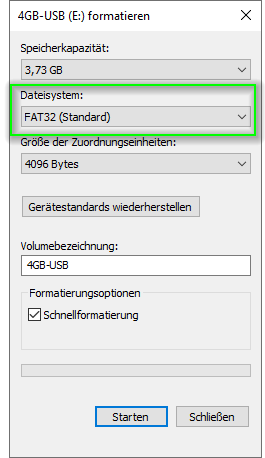
- Format the stick to
FAT32.
There are two ways to save the pairing file to the USB stick:
Download pairing file via web interface
- Download the pairing file
pairingInfo.jsonfrom theAdmin Settingssection of the web interface:
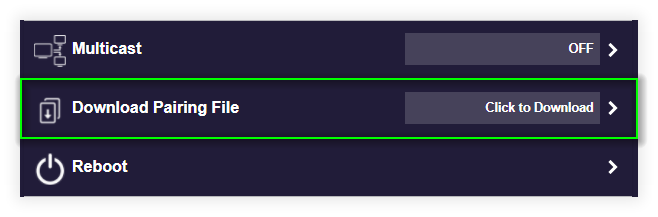
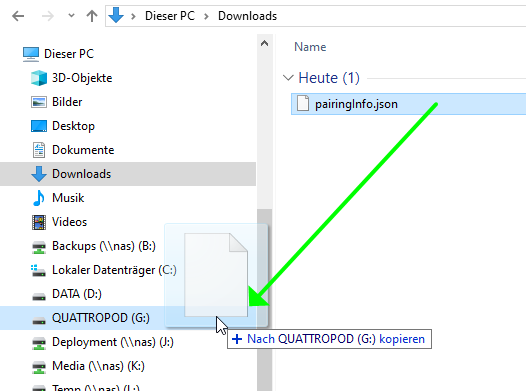
- Then copy the file to a USB stick. You do not need to delete other files.
IMPORTANT: The pairing file must be saved at the root of the USB stick.
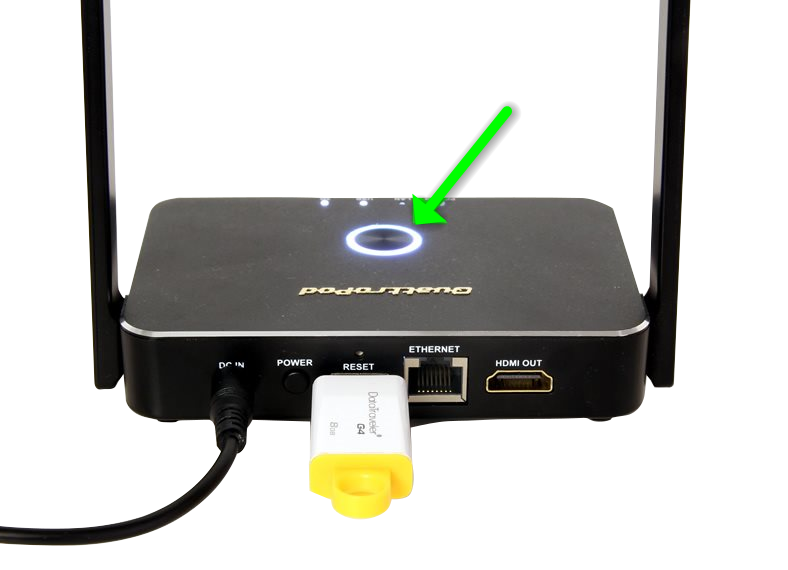
Download pairing file via receiver
- Connect the USB stick to the USB port of the receiver and press the pairing button on the top of the receiver. After a few seconds, the pairing file is copied to the USB stick and the receiver's pairing button lights up white.
Connect USB stick to the transmitter
Note
This step must be done in the same room or within wireless range of the receiver.
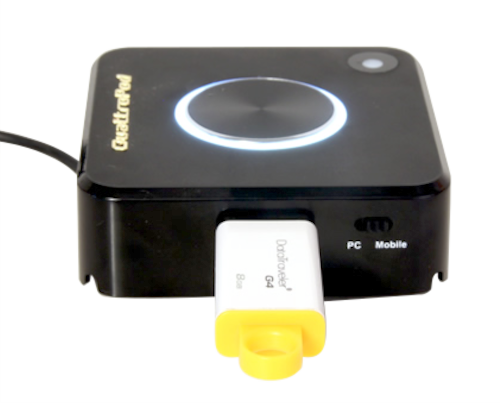
- To start pairing via USB stick, switch the transmitter to
Mobile.
- Connect the transmitter’s USB cable to a USB power source (5V1A) and insert the USB stick into the USB port of the transmitter. Pairing begins automatically. The transmitter blinks red, white, and green several times during pairing. After about 30 seconds, the transmitter is paired with the QuattroPod receiver. When pairing is complete, the transmitter lights up white:
The transmitter can now be used with the receiver. Finally, switch the transmitter to the desired mode and connect it to the desired end device:
-
Mobile= Smart devices -
PC= Windows/macOS