Pairing the Transmitter
The Cast Go! transmitter is paired by default with the supplied receiver. If you need to replace this transmitter or want to pair the transmitter with another Cast Go! receiver, please follow the instructions below.
Pairing the Transmitter via QR Code
Note
This step must be performed in the same room or within wireless range of the receiver.
Open Device Settings
- To access the device settings, connect your notebook to the Cast Go!, either with the Cast Go! SSID or with the same Wi-Fi infrastructure to which the Cast Go! is connected:
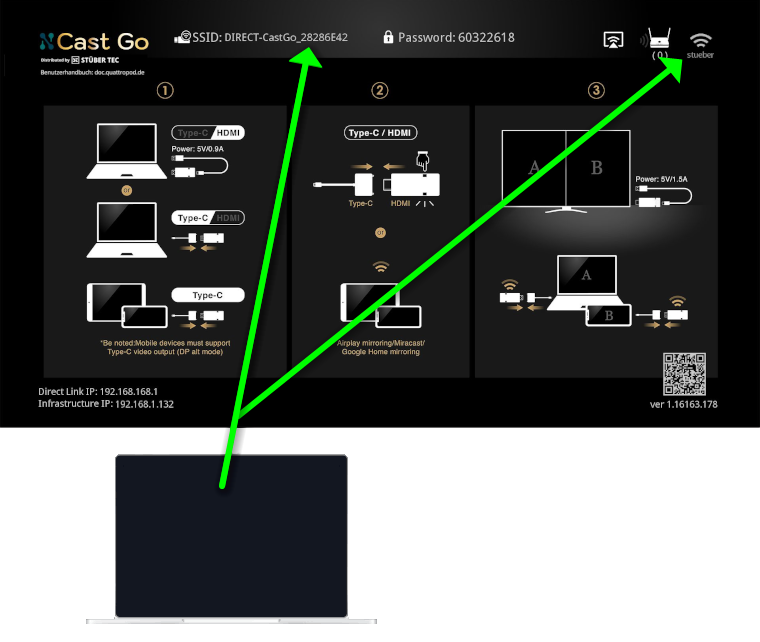
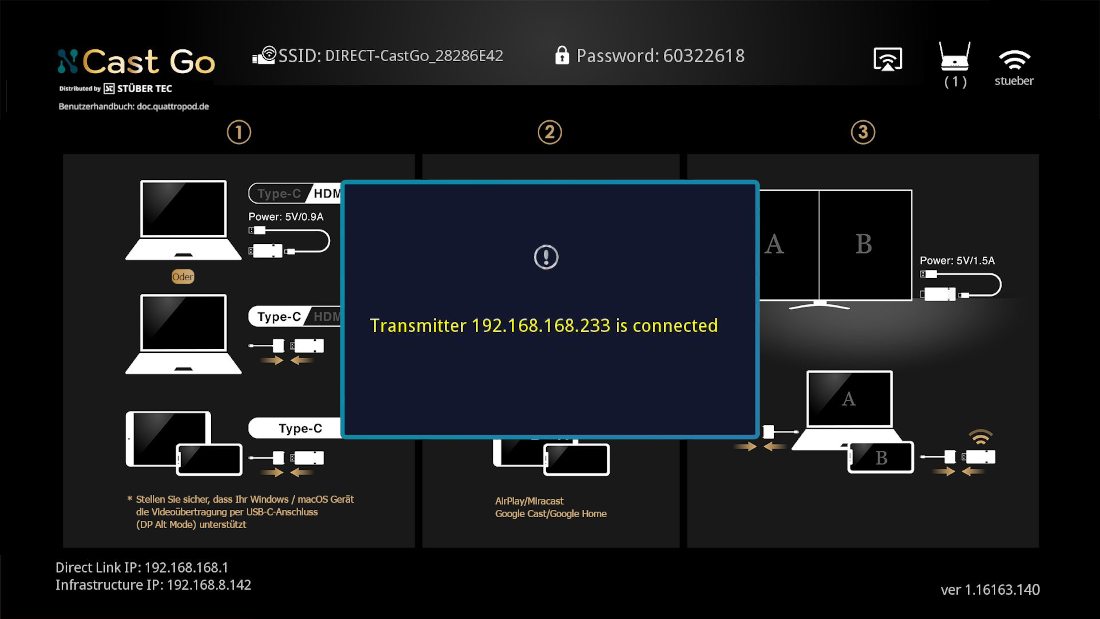
- Enter the IP address of the Cast Go! in the address bar of a web browser, either a)
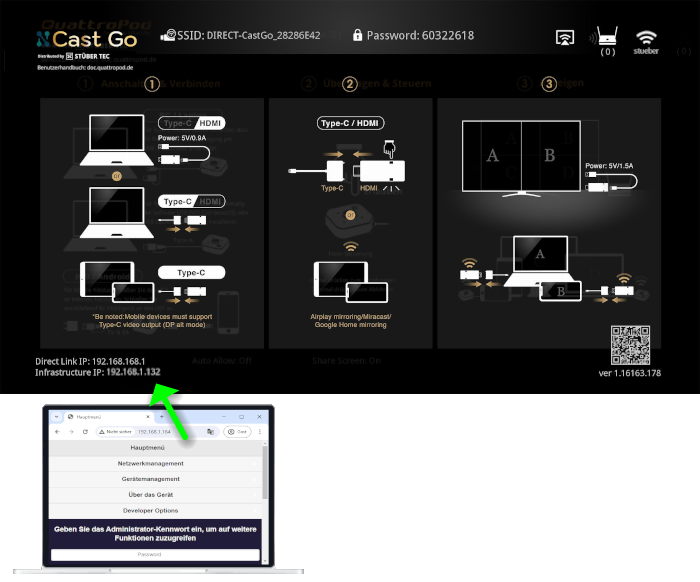
Direct Link IPor b)Infrastructure IP, depending on whether your notebook is connected to a) the SSID of the Cast Go! or b) your wifi infrastructure. The Cast Go! settings interface appears:
Show QR Code
- After entering the IP address of the Cast Go!, the QR code appears at the bottom of the main menu:
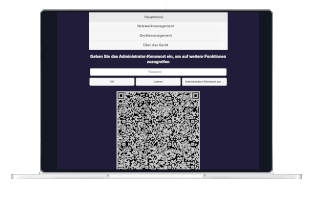
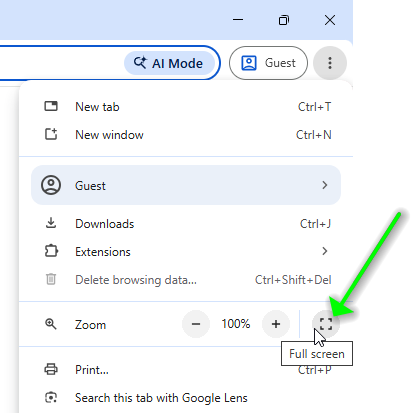
- First, center the QR code by selecting fullscreen mode in your web browser:
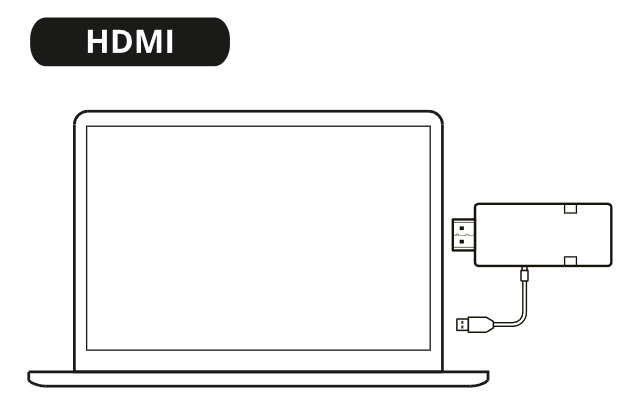
Connect the Transmitter via HDMI
- Remove the Type-C adapter from the transmitter. Connect the transmitter to an HDMI port of a notebook. For powering the transmitter, connect the supplied USB charging cable to the transmitter and a USB-A port on the notebook:
Pair Transmitter to Receiver
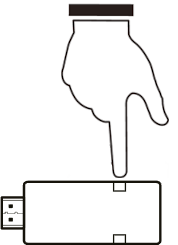
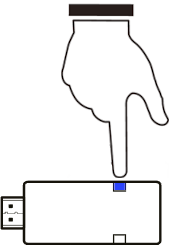
- Wait approximately 30 seconds while the transmitter powers up. Then hold the button for about 5 seconds to pair the transmitter to the receiver:
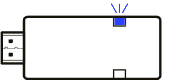
- As soon as a fast blue blinking starts, release the button:
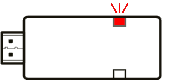
- Afterwards, the transmitter blinks slowly red:
- Within 5 seconds, the transmitter detects the QR code and pairs with the receiver. This is confirmed on the start page with "Transmitter 192.168.168.xxx is connected":
Mirror Your Screen
- You may now either mirror your screen via the HDMI port
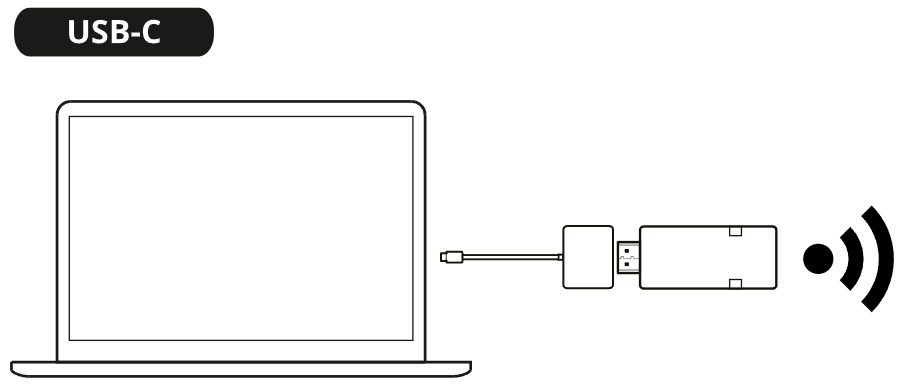
- or via the USB-C port using the Type-C adapter
- Press the transmitter button to mirror your screen:
Further information about how to mirror your screen in USB-C transmitter mode and HDMI mode can be found in the Quick Start Guide.
Pairing the Transmitter via HDMI Pairing Connector
Connect Transmitter and Receiver via Pairing Connector
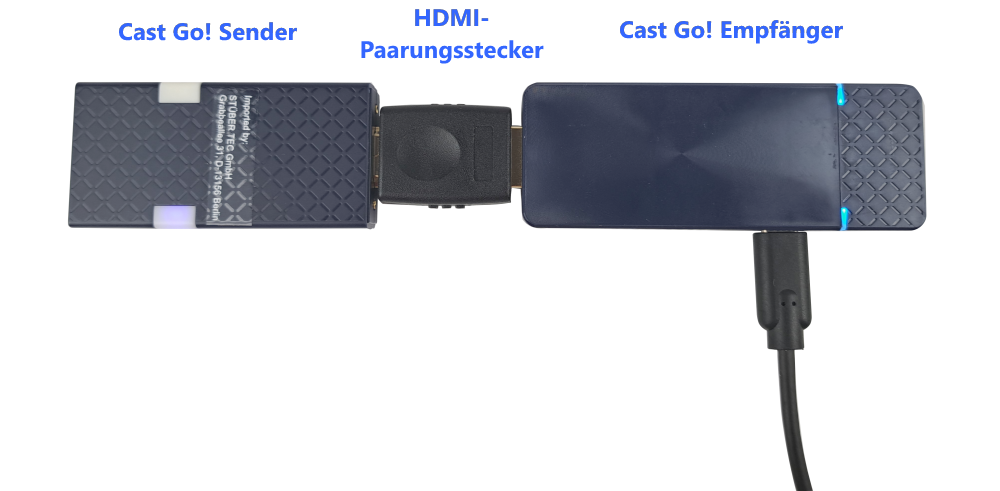
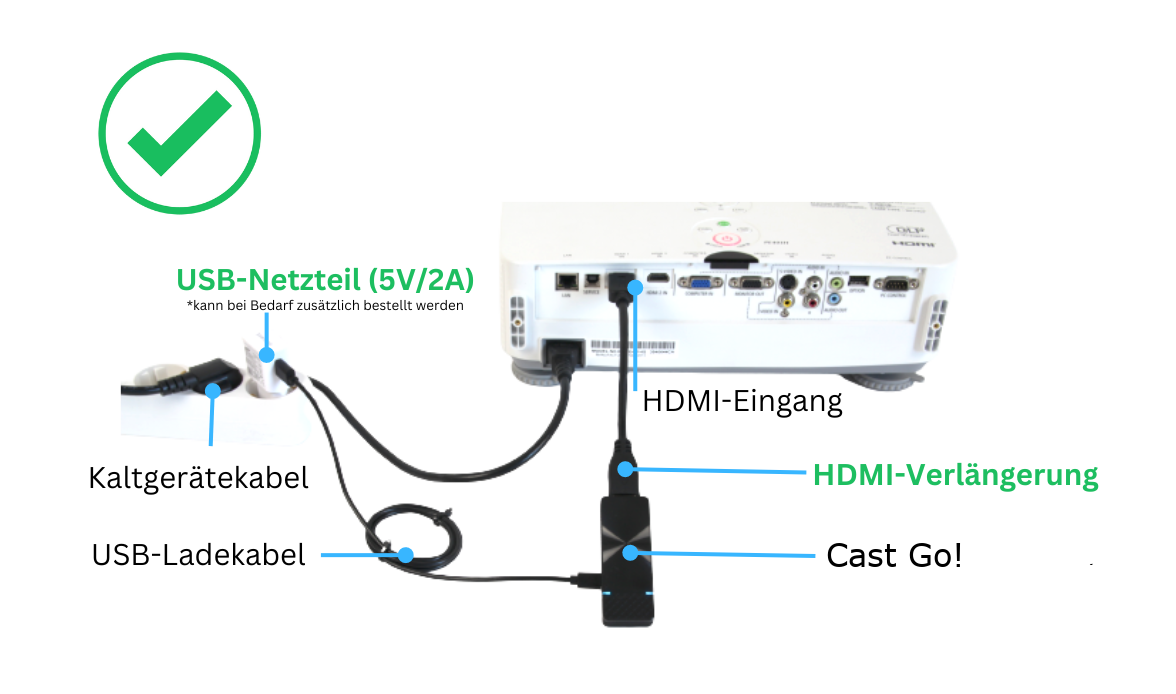
- Connect the supplied USB-C charging cable to a USB power outlet that provides at least 7.5 W (5 V / 1.5 A). Remove the Type-C adapter from the transmitter. Connect the receiver and the transmitter with the HDMI pairing connector:
Pairing Transmitter to Receiver
- When the power supply is connected, wait 30 seconds while the receiver and transmitter boot up. Then hold the button on the transmitter for about 5 seconds to reset the previous pairing:
- As soon as a fast blue blinking starts, release the button:
- Afterwards, the transmitter blinks slowly red:
Mirror Your Screen
- Connect the receiver of the Cast Go! to the HDMI input of your display device. For power supply, connect the supplied USB-C charging cable to a USB power outlet that provides the minimum current of 7.5W (5V/1.5A):
To learn exactly which setup is best suited for you, please carefully read our Setup Recommendations.
- Connect the transmitter to your device and press the button on the transmitter to mirror your screen:
Further information about screen transmission in USB-C transmitter mode and HDMI transmitter mode can be found in the Quick Start Guide.